The Chair Project
We suddenly find ourselves, in retirement, living on a somewhat austere budget. Gone are the days of eating out whenever we pleased (a rarity anyway, as we eat so well at home) or buying a book we want to read (thank goodness for the Multnomah County Library!)
So when it comes to making our sweet house into a home, I'm looking for ways to save money, reuse or repurpose what we have, etc. I've become a devotee of Craigslist and some DIY websites (especially this one) which are teaching me even more than I learned at my father's knee or my husband's side over the past 60 years or so.
I'll be blogging about renovating my home study from time to time until it's done. This is reminiscent of my daughter's question to me when she was about twelve: "Mom, when they were inventing cottage cheese, how did they know when they were done?"
I'm not sure how I'll know when I'm done with this, but I'll probably figure it out. Anyway, today's installment is about refinishing chairs.
 I found these chairs for $5 each at a restaurant supply store (advertised on Craigslist). They are very sturdy and well made, but were dirty and the finish was flaking off. The faux leather seats were dreadful, and both of them were webbed with dust, cobwebs and leaves; they probably had been stored in a barn somewhere.


Once the chairs had two coats of color on them and were left to dry for several days (yes, that's longer than they say you'll need, but why take a chance that you'll dent or mar that fresh paint by touching it too soon?) I got going on the seats, which turned out to be amazingly easy peasy.


So when it comes to making our sweet house into a home, I'm looking for ways to save money, reuse or repurpose what we have, etc. I've become a devotee of Craigslist and some DIY websites (especially this one) which are teaching me even more than I learned at my father's knee or my husband's side over the past 60 years or so.
I'll be blogging about renovating my home study from time to time until it's done. This is reminiscent of my daughter's question to me when she was about twelve: "Mom, when they were inventing cottage cheese, how did they know when they were done?"
I'm not sure how I'll know when I'm done with this, but I'll probably figure it out. Anyway, today's installment is about refinishing chairs.

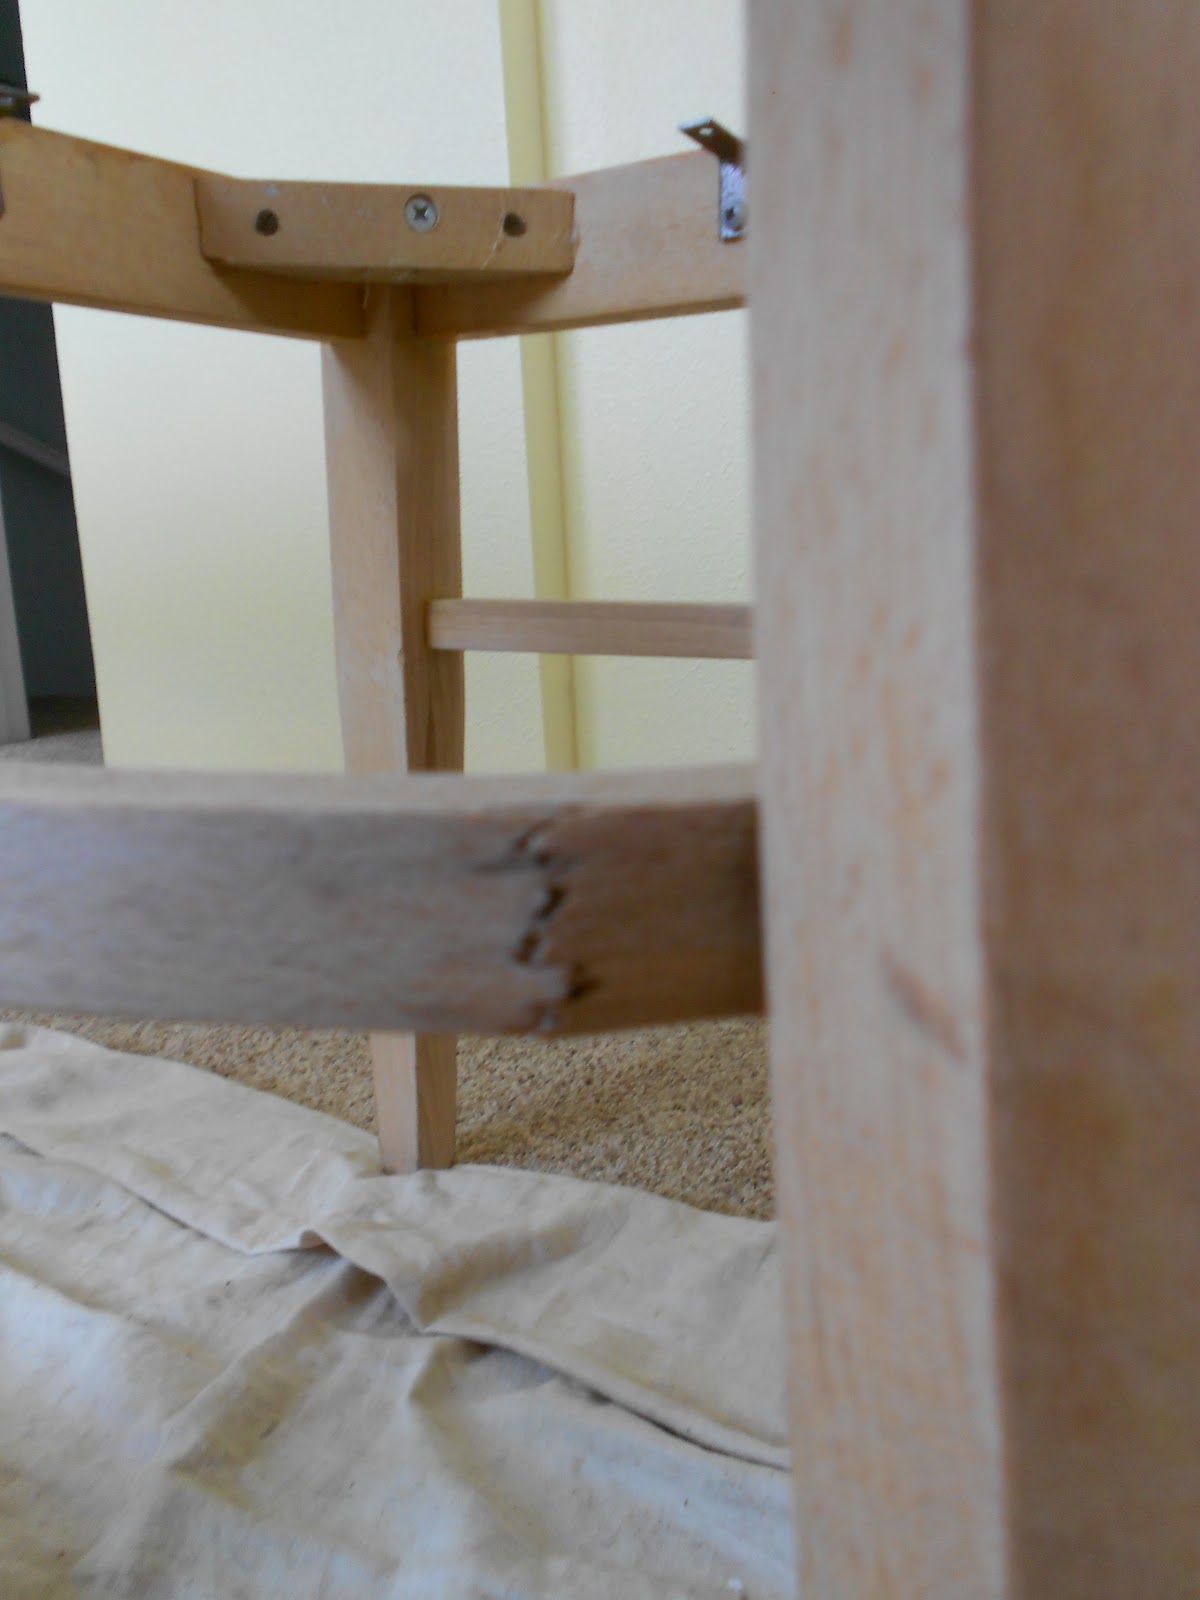
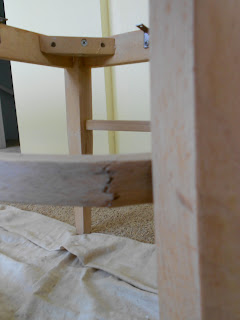
Had we looked more carefully while we were in the dingy attic of Rose's Restaurant Supply, we would have noticed this crack in a rung of one of them. However, Duane says the wood is a laminate and since this crack is only in the outer layer, it probably won't make much difference, so I didn't do anything about it.

After removing the seats, it was easy to sand using a little electric mouse sander with 100 gauge sandpaper for the flat surfaces, and sanding the curved surfaces by hand. Because the finish was already flaking off, this went very quickly. The sanding was done outdoors, of course, on the one day in weeks when the sun was out. I brought them upstairs to my study (note new paint on the walls) where they'd stay dry in the Portland weather, and the floor was covered with a drop cloth anyway from the wall-painting project.

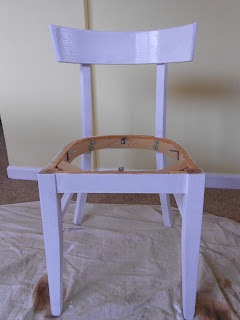
Here's one after being painted with one coat of oil-based primer. (I learned from the kids at Young House Love that you can paint latex paint over oil-based primer, and it's better to use oil-base primer because it seals much better than latex.) My mistake was not painting the horizontal surface on the seat, which I thought would be covered by the cushion. But unpainted bits showed around the edges, so I had to wait to install the seats and go back to paint the part that shows as natural wood above.

I just love me a nice fresh can of paint, don't you? This is Benjamin Moore's "Intercoastal Green" in the Aura semi-gloss base. It's a low VOC (volatile organic compound) paint which is really nice to work with and good for the environment.

You do know the ol' nail trick, don't you? Before you start painting, pound a few nail holes in the lip of the can so that paint will run back down into the can instead of all over the outside. Not only does it save paint, but you want to keep the outside of the can as clean as possible so you can identify the paint later. But just to be sure, you'll want to identify the paint by writing on the cover of the can, which of course you will keep pristine. And for heaven's sake, don't write "Judy's study," because the next owner of the house won't know what room that is. Instead write its geographic location, like "upstairs north bedroom."
Once the chairs had two coats of color on them and were left to dry for several days (yes, that's longer than they say you'll need, but why take a chance that you'll dent or mar that fresh paint by touching it too soon?) I got going on the seats, which turned out to be amazingly easy peasy.
I pried off the old nasty faux red leather, which was attached with about a zillion staples. My plan had been to replace the foam under it, but that foam was very tightly glued to the chair bottoms and it looked okay -- not ratty or coming apart, and pretty darn clean -- so I just decided to put the new fabric over it.

I put the seat foam side down on the wrong side of the fabric and traced around it. Then I made another line 2" outside of the tracing, and cut the fabric along that line. Here's the seat face down on the wrong side of the fabric. (I've already cut out one piece of fabric to the right; that's the dining room table showing through.)

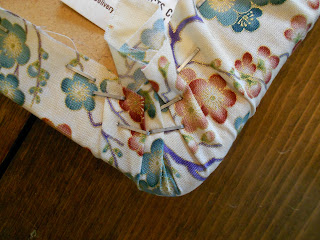
Then using your trusty antique staple gun (which takes two arthritic hands to squeeze all the way down), you start stapling. I put three staples on the straight edge of the bottom first, then turned it around and put a few at the top, stretching the fabric as tightly as I could. Just work your way back and forth pulling it tight and stapling one side and then the other. Oh, and don't rest the heel of the staple gun on the table unless you want a lot of little dents in the table like we have now. A doubled-over towel under the whole thing would have prevented that.

The only tricky places were the corners, where I was trying to keep the fabric perfectly smooth on top with no visible pleats or folds. I pulled it up in the center of the corner first, then pulled up one side and then the other, easing the fabric with each pull. Staples are cheap, so I used a lot!

There we go, all done!

And here's the final product, ready to be sat on!
Just to help you remember where I started, here's the "before" picture again. I'm so glad that in this big project there is finally an "after" to show you!
TA DAA!!!
posted by Judy at 1:50 AM
![]()
![]()

4 Comments:
Hi, Judy,
It's going to be fun following your progress as you make your new house a real home. I can't wait to see it!
Kit
Wow, SO motivating! Ack, I don't have time for motivation, I'm seeing the MFC in September!
Beautiful chairs!
Love the color you picked for the chairs! That tealish blue is one of my new obsessions!
Thanks for stopping by my blog today! :)
Woodworking guide offers anyone of any skill level the ability to build amazing projects. The guide is extra helpful because it offers more detailed explanations, videos and blueprints then your typical woodworker magazine.
Download 16,000 Woodworking Plans & Projects
https://wood-plan.weebly.com/
Arbor Projects ,
Adirondack Chairs ,
Artwork Display ,
Bathroom Unit ,
Box Designs ,
Billiard/Pool Table ,
Barn Plans ,
Bed Plans ,
Bedside Cabinets ,
Bee Hive Plans ,
Bench Projects ,
Bird Feeders ,
Birdhouse Plans ,
Boat Plans ,
Book Case Plans ,
Baby Changing Table ,
Coat Rack ,
Cabin Plans ,
Cabinet Plans ,
Carport Plans ,
Cart Plans ,
Cat House Plans ,
CD/DVD Holder ,
Cellar Projects ,
Chair Plans ,
Chest Designs ,
Chicken Houses
Childrens Room Plans ,
Clock Plans ,
Coasters ,
Coffee Table Designs ,
Cold Frame Plans ,
Compost Bin ,
Computer Desk ,
Containers ,
Cradle Projects ,
Small Crafts ,
Cutting Board ,
Deck Plans ..
Post a Comment
<< Home